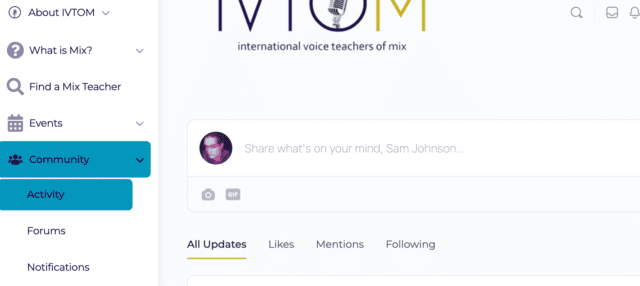
The activity board in the Community tab functions as our discussion board. This board is chronological. Please use it.
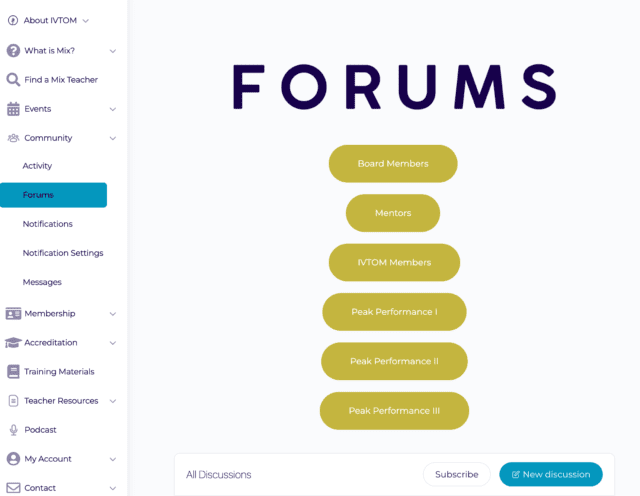
Forums are now a place for more in-depth discussion, planning, questions, and learning. Forums are currently all private, and only the ones you have access to will be visible.
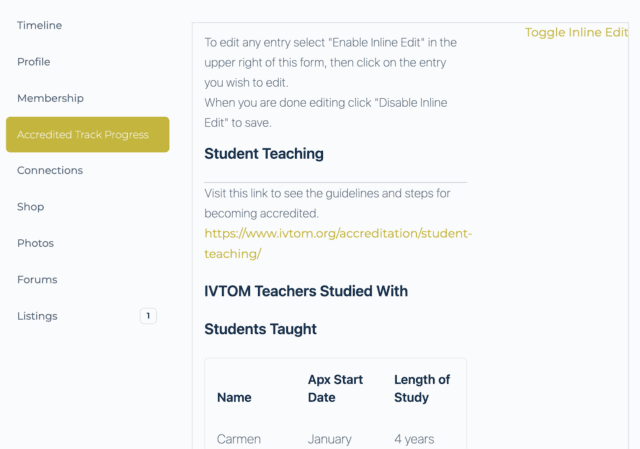
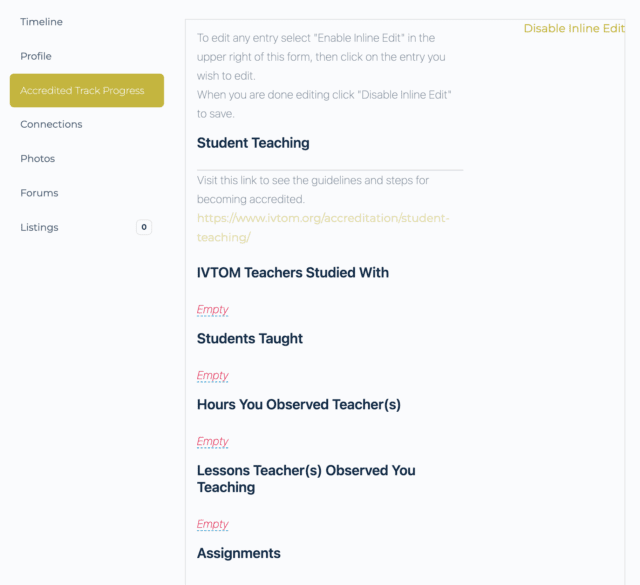
On the profiles of people with the role “Accredited Track” there is this a tab “Accredited Track Progress.”
Please encourage mentors and accredited track members to use this form to track their progress. It functions as a formalized application to become accredited.
Visit this link to see the guidelines and steps for becoming accredited.
https://www.ivtom.org/accreditation/student-teaching/
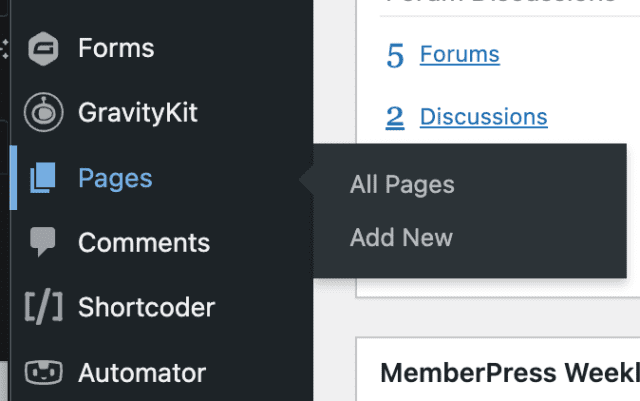
- Members > Roles or Add New Role
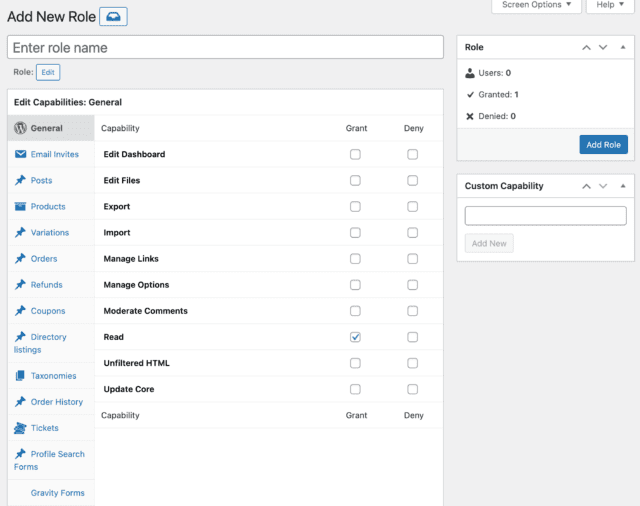
These are fairly endlessly customizable.
The only permission that should be ticked is General > Read
New roles should only be used for content protection.
Add role name and click blue “Add Role”

- MemberPress > Rules > Add New
- Name your rule
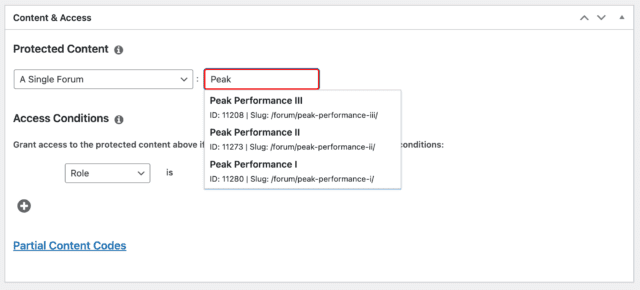
- Select what you want to protect.
- If you are doing a forum, make sure the forum is set to public, not hidden or private. On the forum creation page, do not select any roles at the bottom where you can content protect. MemberPress is the only way to protect content in a way that doesn’t break things.
- Type the name of whatever you are protecting, and click the option in the dropdown list. If you don’t click the option in the dropdown it will not work.
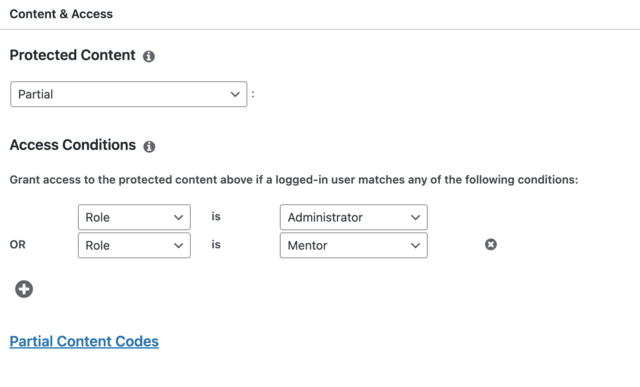
- If you are doing partial content protection, such as only a section of a larger page, select “Partial”.
- Select whichever roles will be able to access the content. In this screenshot, logged-in Administrators and Mentors will be able to see it, but no one else will.
- Save Rule
- On whatever page you are partially protecting, you will need to put a shortcode before and after what is being protected. Each of these code blocks needs to be surrounded by square brackets [ ].
mepr-show rules="11111" unauth="message"Content being protected
/mepr-show
Or if you want to show content to everyone except authorized members:
mepr-hide rules="11111" unauth="message"Content shown to everyone but members
/mepr-hide
- Replace the 11111 with the ID number of the rule.
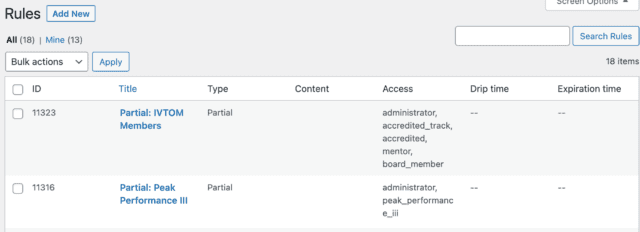
- For example, using ID 11323 would allow Administrators, Accredited Track, Accredited, Mentors, Subscribers, and Board Members to see or be excluded from content.
You can use these shortcodes on any page or post. If you are using Elementor (you should be whenever given the option, it is easier and looks better) you need to use the HTML Block. Do not use the Shortcode block even though it sounds like it should work the same. It does not work the same.

This is what the Forums page looks like in Elementor with working partial protection tags:
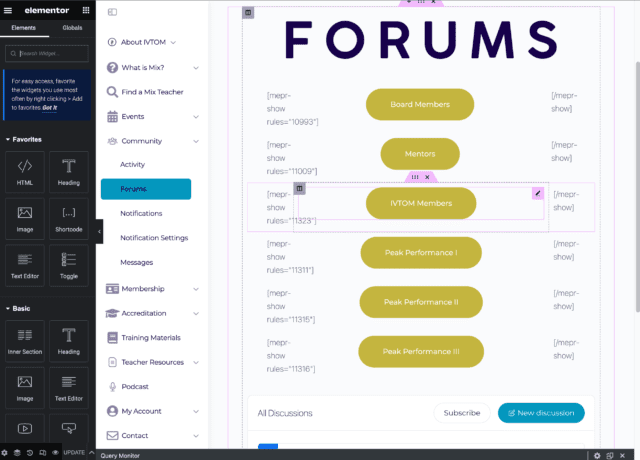
Each row contains a “Inner section” block with three columns. The left and right columns are where I put the “HTML” blocks for shortcode. The middle column I put a button with a link.
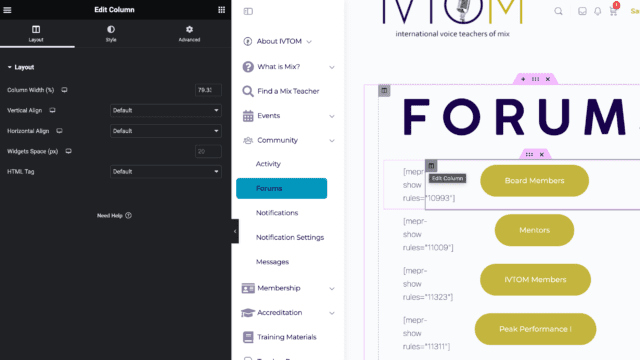
I tried to set the middle column width to 80% and the side columns 10% each. It didn’t completely work but I got close enough.
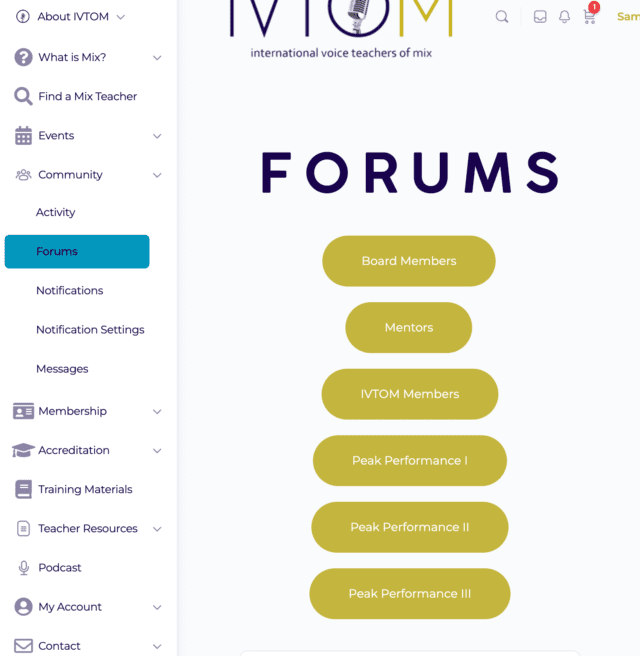
This screenshot is how that page displays to someone who is logged on with appropriate roles:
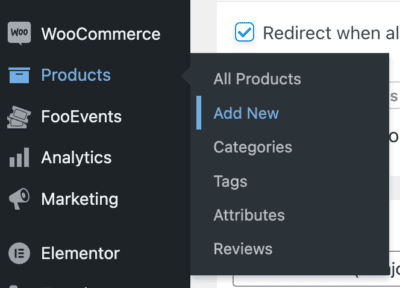
– Select Products > Add New in the site’s backend.
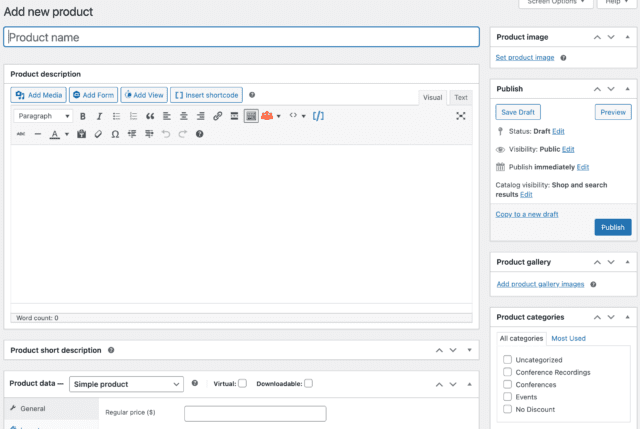
- Add a title, description, image, and appropriate categories.
- Categories are how events auto-populate in the storefront.
- Check the “No discounts” category if you don’t want it to be eligible for location based discounts but potentially will create other coupons for it in the future.
- Select “Virtual” unless you’re going to mail whatever you’re selling yourself.
- Select “Downloadable” if the product is downloadable pdfs or mp3s.
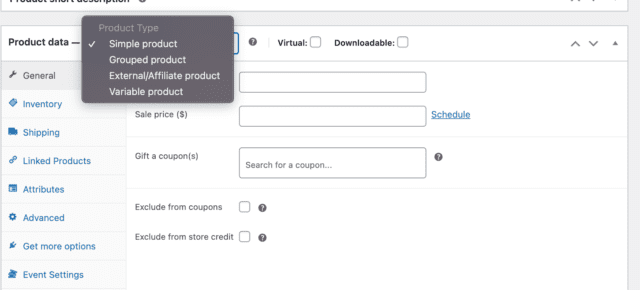
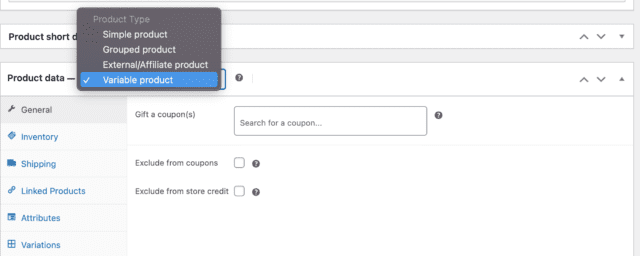
- Select “Simple product” if the event or product will have one price option.
- Select “Variable product” if it will have multiple price options, e.g. member/non-member.
- Input “Regular price”
- Check “Exclude from coupons” if you don’t want it to ever work with any coupons or discounts.
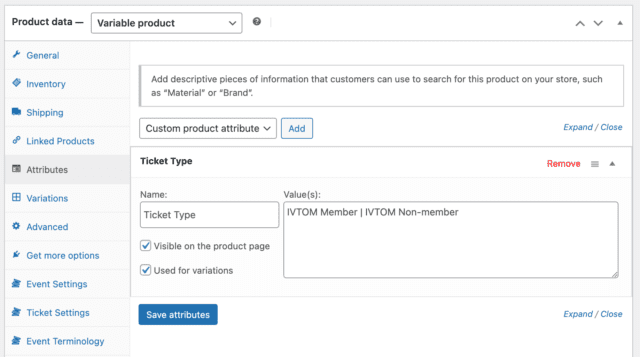
- Select “Attributes” in the blue and gray left-hand menu.
- Input the “Name” of the thing they will be purchasing that there will be variations of. In this example I put “Ticket Type”.
- In “Value(s)” input the kind of variations you will be using, separated with a “|”. This will usually be “IVTOM Member | IVTOM Non-member”
- Save attributes.
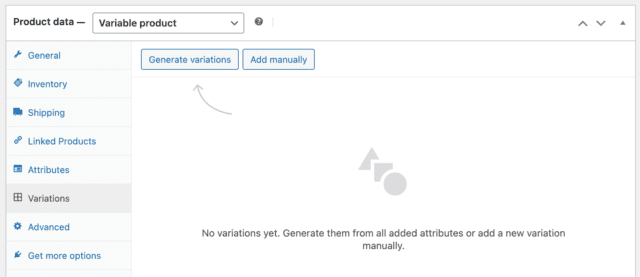
- Click “Variations” on the left-hand menu.
- Click “Generate variations”
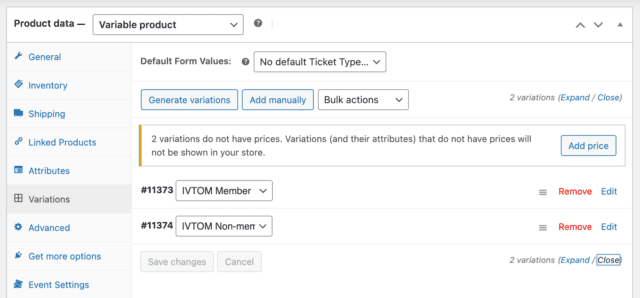
- In the bottom right click “Expand”
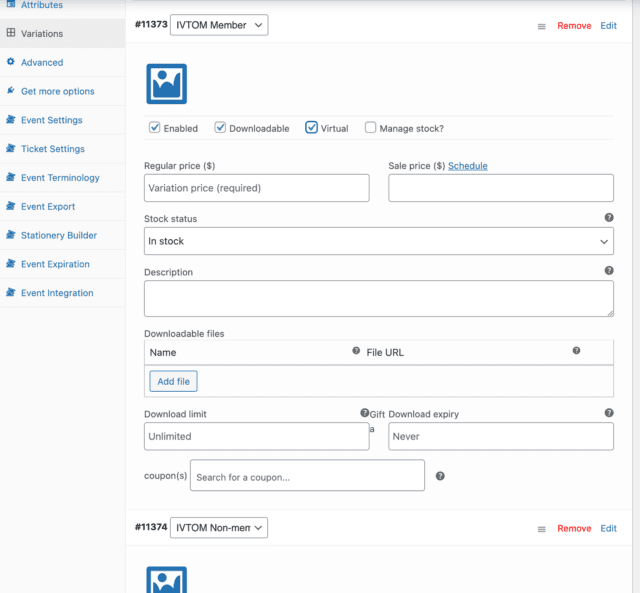
- Click “Downloadable” and “Virtual” if they apply
- Add the price, description, and any downloadable files.
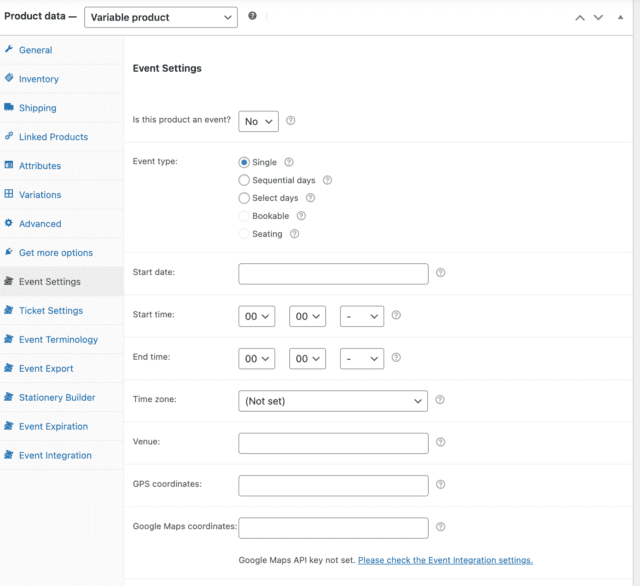
- If you are making an event, click Event Settings in the left-hand menu.
- Select that it is an event, how many days, start date, time zone (we use MST/MDT Americas – Denver), if it is a virtual event say that the Venue is “Zoom”.
- If you want there to be a contact email for the event organizer enter that by “Email address”
- Add “Thank-you page text” if you want.
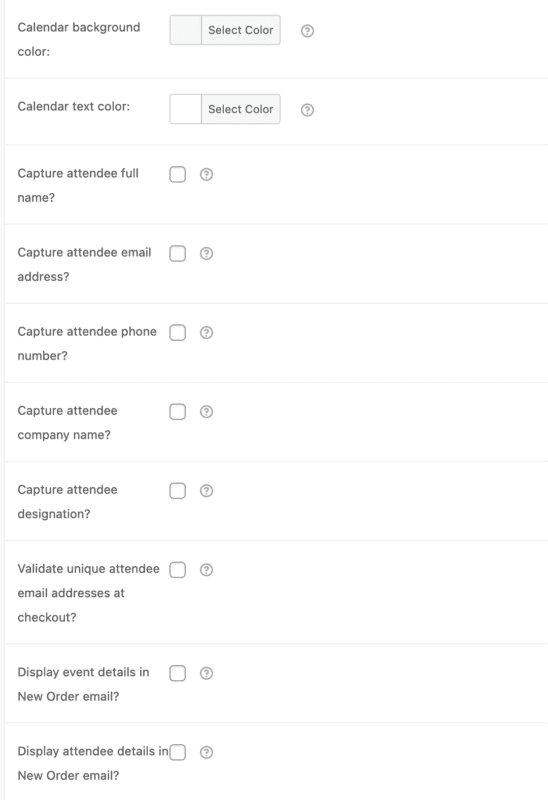
- At the bottom of this page there are a bunch of Capture something boxes.
- Do not check next to anything that says “Capture”. It breaks PeachPay.
- Go to the “Ticket Settings” tab and scroll to the bottom.
- Check “Display event details in New Order email?”
- Check “Display purchaser or attendee details on ticket?”
- Check “Display “Add to calendar” option on ticket?””
- Check “Display date and time on ticket?”
- Check “Display Zoom meeting/webinar details on ticket?” (if it is a virtual event)
- Check “Display multi-day details on ticket?” (if it will be over multiple days)
- Check “Email tickets?”
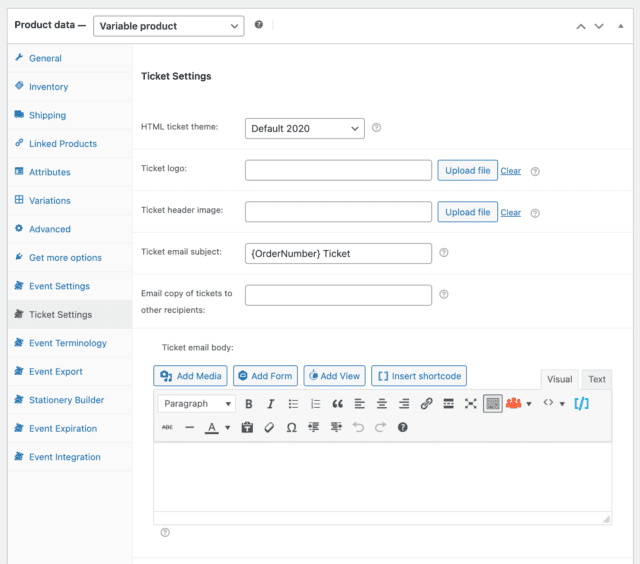
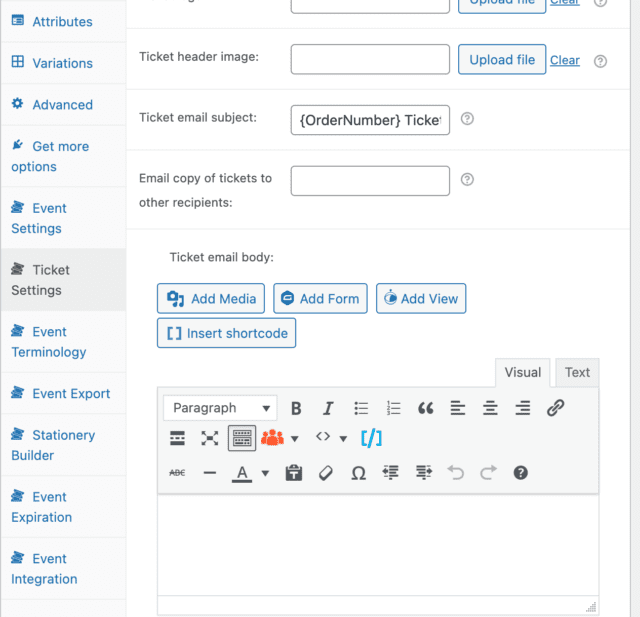
- Go to “Ticket settings”
- Optionally add a logo or header image.
- Customize email subject.
- Write the ticket email body. Any info you want them to know about your event. This only works to send an email if you are sending tickets. If you have a product that you want an email to be sent with, it’s best to use the Automator plugin.
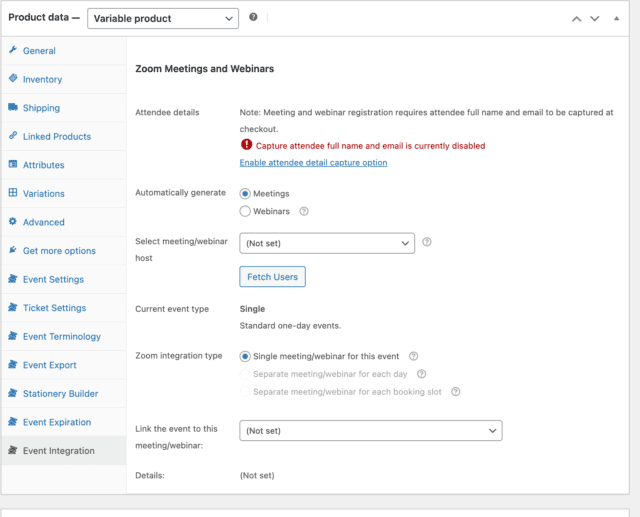
- Do not click “Enable attendee detail capture option”
- If you created the Zoom event already with the IVTOM Zoom account, link this product to that meeting/webinar where it says “Link the event to this meeting/webinar:”
- If you want WordPress to make a meeting for you, select meeting/webinar host as MaryAnnKehler.
- Poke around the other menus if you want to get fancy or achieve something not covered here.
- Publish!
- Open the original event product in one tab/window for reference.
- In another window, begin creating a new product.
- Change original event from Published to Draft.
- Copy the title and description of the original event and paste them into the new product. Edit to make sure it comes across as a recording of a past event.
- Select the appropriate categories, and make sure “Event” is chosen.
- Set it as a “Variable product” if we will have member/non-member pricing, “Simple product” if there is only one price point.
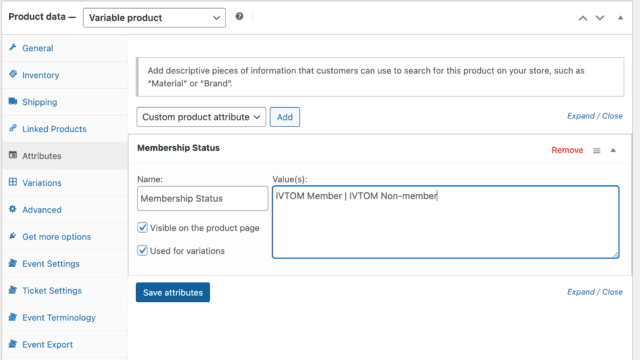
- Under “Attributes” set the name to “Membership Status” and the Values to “IVTOM Member | IVTOM Non-member” or whatever else works best for this product.
- Save attributes.
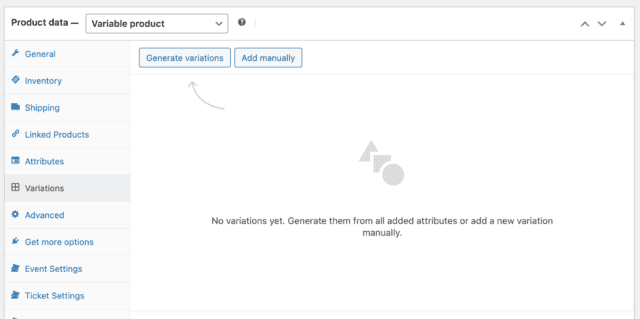
- Under “Variations” click “Generate variations”
- After variations are made, click “Expand” in the bottom right.
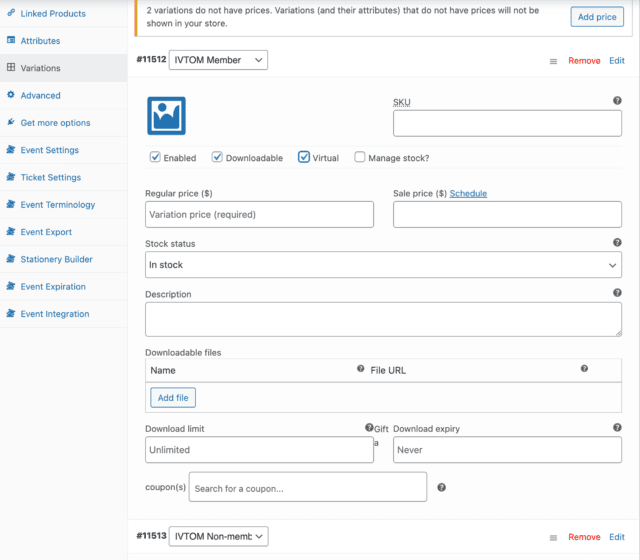
- Check next to enabled, virtual, and downloadable.
- Fill out “regular price”
- Repeat for other variation
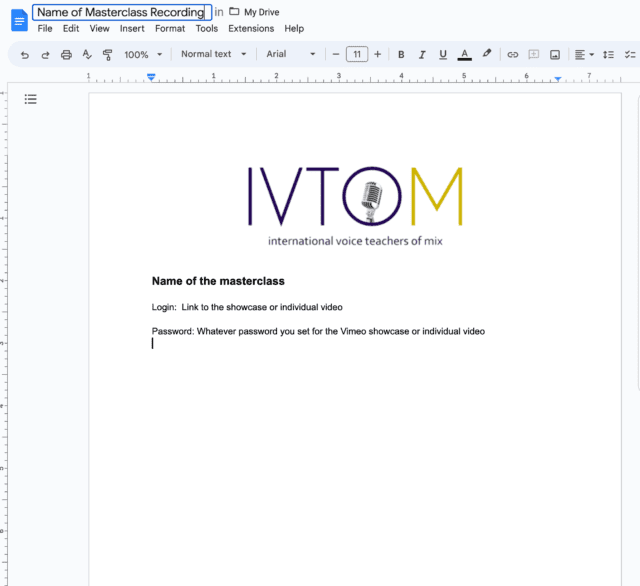
- Create a document that looks similar to the one above but with the correct information.
- Add logo:
![]()
- Export that document as a PDF.
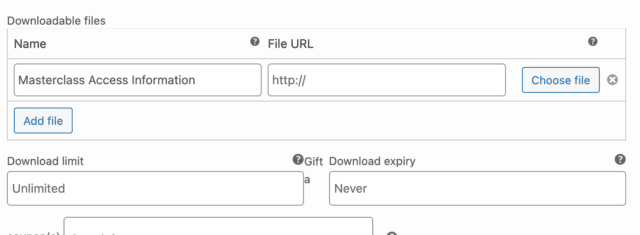
- Go back to the new product creation page and under “Variations” attach the PDF as a download to each variation.
- Name it “Name of event Access Information”
- Click “Choose File”
- Choose the PDF you made then in the bottom right click “Insert File URL”
- Double check everything then Publish!
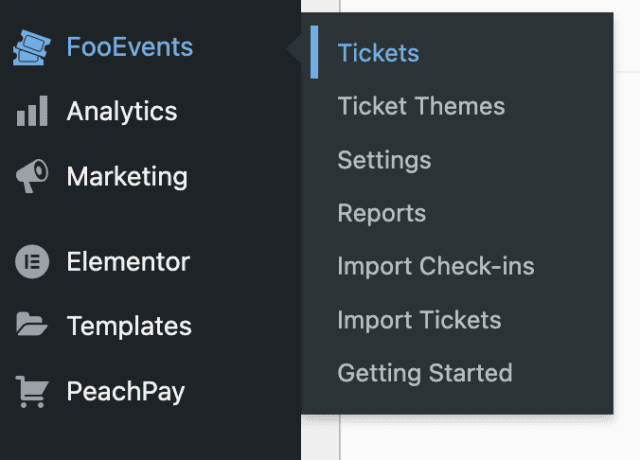
- Select FooEvents > Tickets
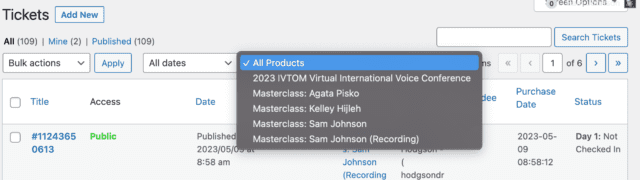
- Select the product whose tickets you are working with.
- Or Search Tickets for something more specific.
- Edit the appropriate entry, and click re-send ticket when appropriate.
- Re-sending the ticket will send the email to whatever email is on file. You can edit an email if needed.
- You can send to all attendees quickly by checking multiple entries and performing a “bulk action” on them.
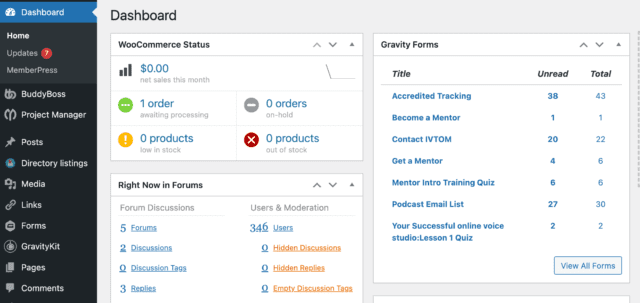
- Go to the Dashboard.
- On the right-hand side, there is a box that says Gravity Forms. Each of these are forms that people can fill out on the website.
- Accredited Tracking is a form automatically created through Automator when someone gets the role of Accredited Track. It puts a form on their profile that can be accessed by them, their mentor, and board members.
- Become a Mentor is forms where someone has applied to become a mentor.
- Contact IVTOM is where people are contacting IVTOM because they love us so much, so we should respond ASAP.
- Get a Mentor is people looking for a mentor.
- Podcast Email List is where people have signed up to be on the email list associated with the podcast.
- Other forms exist, but please don’t mess with them unless you made them.
- Select the thing you want to do.
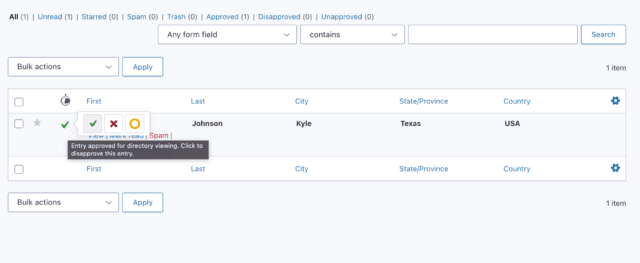
- The yellow circle is for directory viewing approval, not whether an item has been addressed.
- Select “Unread” to find new inquiries.
- Click on the line of your choosing.
- If it is spam, please delete it.
- Either respond to the entry or go back and mark the entry as unread and ask someone who should deal with it to deal with it.
- Use Forms > New Form to create a new form.
- Once your form is created you can embed it on any page. If you are putting it on a page with Elementor editing enabled use a HTML Elementor Block to enter the code.
- Use the following code between [ ] square brackets.
gravityform id="1" title="false" description="false" ajax="true"- Edit id=”” to your form’s number.
We even have the ability to display forms on the website. We currently use that for Accredited Track members to track their progress toward Accreditation. GravityForms is powerful.
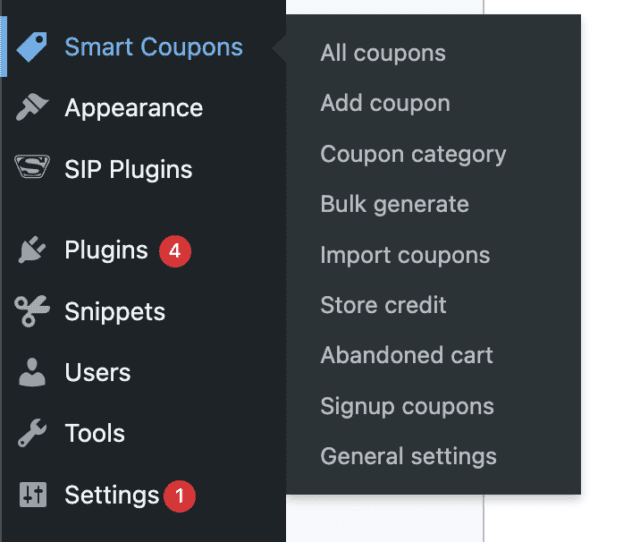
- Go to Smart Coupons > All coupons to see a list of (I believe) every country with a currency less favorable exchange rate from USD. If one is somehow inequitable, please edit it.
- Click add coupon to add your coupon.
- This one is pretty straightforward, but it is cool, and we can use it.
You may want to add a tab to the profile of all users with a certain role to make it easier for them to find certain content better. This is currently being used to track Accreditation progress and easily find the Peak Performance Hub.
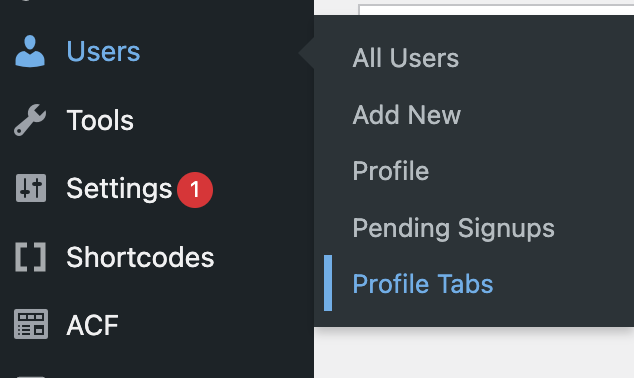
- Users > Profile Tabs

When adding a new one the following settings need to be filled out:
- Is enabled? Check.
- Tab Label
- Set it as default component? Not checked.
- Add this tab for?
- Select whatever role needs the tab
- Tab Visibility
- Select whoever can see the tab. Generally limit this to as few people as necessary to keep profiles tidy.
- Position
The following numeric positions are used by BuddyPress tabs
- Activity – 10
- Profile – 20
- Notifications – 30
- Messages – 50
- Friends – 60
- Groups – 70
- Settings – 100
The number decides what will be the order of the tabs. Using a smaller number puts the tab before others.
- Tab Link: what page opens when you click the tab
Similar settings apply if you are adding sub-tabs.
Here is the official documentation for more customization:
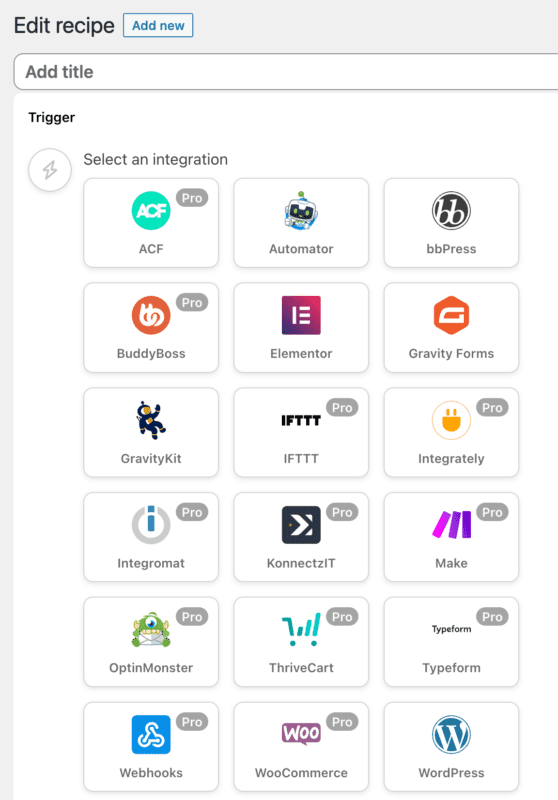
- Dashboard of Automator has good info on getting started.
- All recipes to view all automation.
- Add new recipe to make a new automation.
- Most sales related automation needs to work for Everyone.
- Name your recipe
- Select what will trigger the automation.
- Likely will be WooCommerce to begin a sequence when a purchase is made.
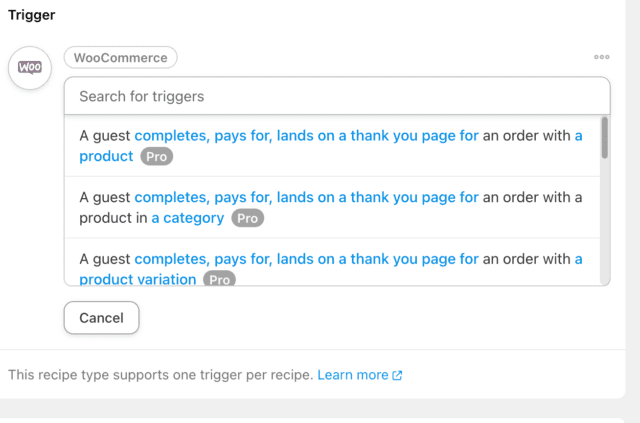
- Select your trigger.
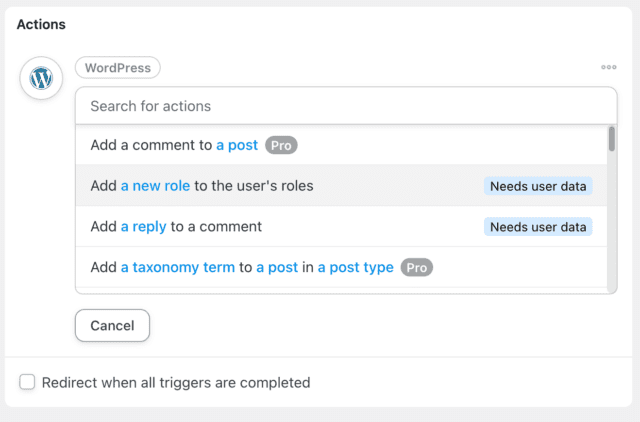
- Select whatever you want to happen. Typically emails are sent through Emails or roles are added through WordPress.
- It may then ask you to Set user data. Do that.
- Have this perform on an existing user.
- If you are adding roles it is to restrict certain content on the website. In that case we will need them to be able to log in.
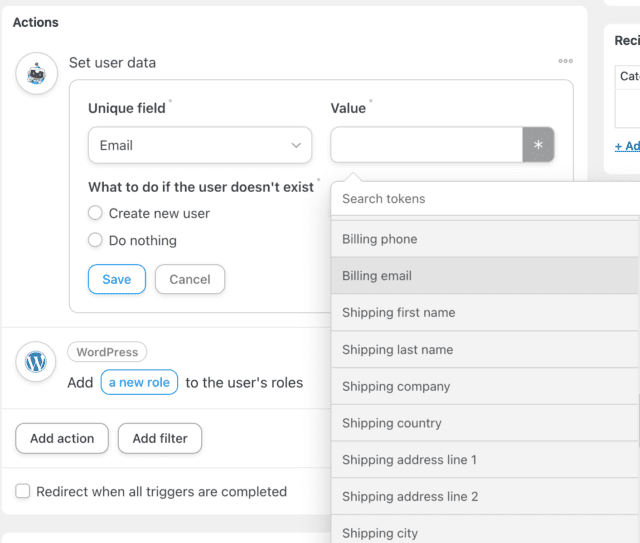
- Select Billing email.
- To the question “What to do if the user doesn’t exist” check “Create new user”
- Have the first name, last name, and email populate with the appropriate billing data tokens by clicking the little * on the right side. Make sure it pulls from the WooCommerce trigger.
- Set the username to the billing email. Usernames are not public on the website.
- Select whatever Role you created.
- “Yes” log this new user in.
- Add the appropriate role below.
Add more actions, such as emails that will automatically trigger upon a sale.
If automation creates a new user, make sure to include a password reset token in an email sent to them so they can set a password.
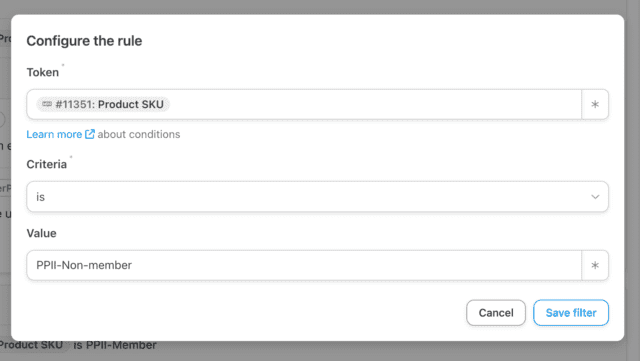
If there are variations to the WooCommerce product that you want to have different actions happen to use a Filter. Have the token be “Product SKU” from the WooCommerce Trigger list of tokens.
Insert the appropriate SKU under Value. When making a product you can custom enter SKUs under “Variations”. Any SKU that you use in Uncanny Automator has to be a variation of the product we used to trigger Automator.
Gravity View lets you display Gravity Forms data on the front end of the website.
It is currently used for Accreditation Tracking.
Here’s how Accreditation Tracking is set up in case anyone else ever needs to manage it, or you want ideas on how to link multiple plugins together.
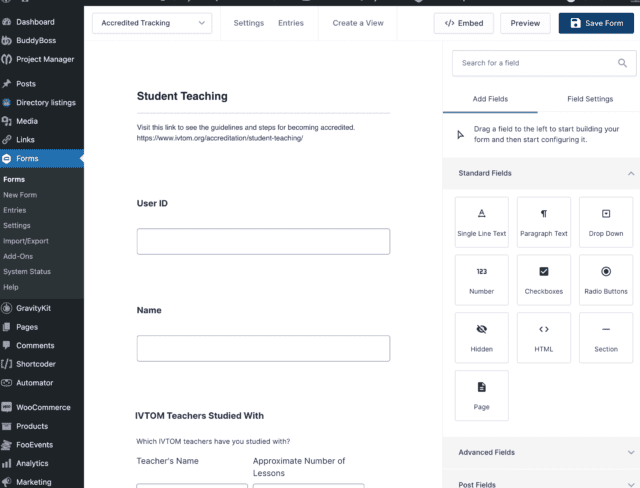
This screenshot is of the form edit page for Accreditation Tracking.
The User ID and Name fields at the top of the form are used just for getting the correct form to the correct profile and finding specific forms in the back end. They are not viewable or editable on individual profiles.

This is the Edit View page for Accreditation Tracking, findable through GravityKit > All Views
It is set as a Multiple Entries Layout. See official documentation of the differences:
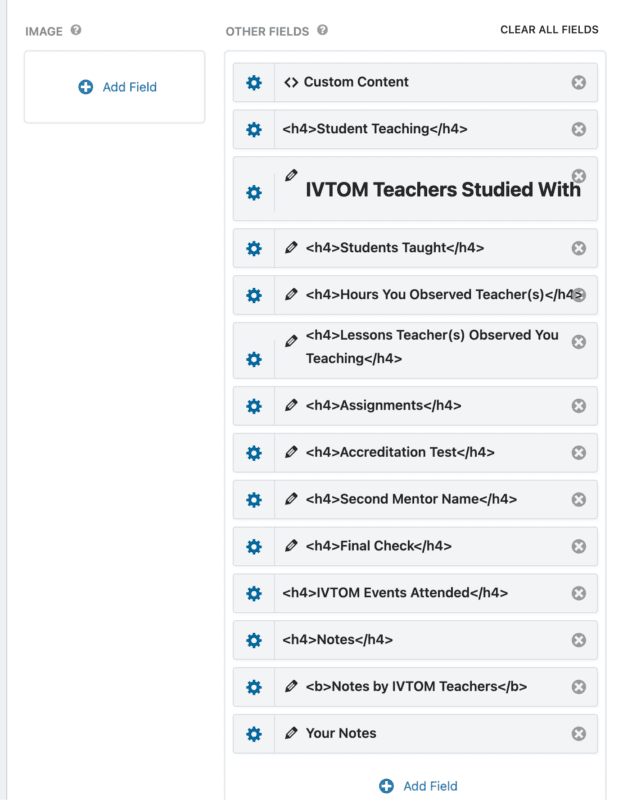
Each of these was added with the Add Field button at the bottom. Custom labels were added for formatting purposes.
In settings underneath the following are checked:
View Settings
- Enable Inline Edit
- This allows us to edit the form within the view on a profile page.
- Strict Entry Match
- This allows only the correct form to populate on an individual’s page rather than many other people’s forms as well.
Edit Entry
- Enable Edit Locking
- Allow User Edit
- So individuals can keep track of their own progress as well as Administrators and Mentors.
Permissions
- Prevent Direct Access
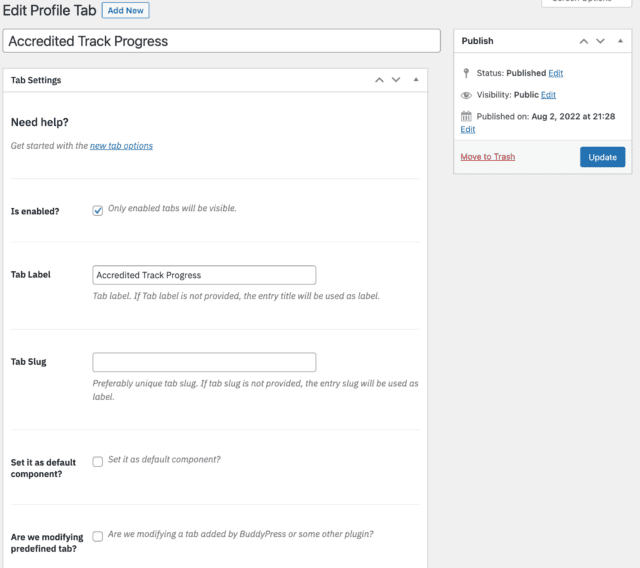
On the Edit Profile Tab page (Users > Profile Tabs) here are the settings:
Tab Settings
- Is Enabled? Yes
- Tab Label: Accredited Track Progress
- Add this tab for? Accredited Track
- Tab Visibility: Profile Owner, Mentor, Board Member
- Position: 31 (directly underneath “Notifications”)
- Default Subnav Slug: {bpps_profile_username}
- I can’t remember why I did this but I think it’s essential?
Subnav
- Is enabled? Yes
- Label: Accreditation Progress
- Slug: accreditation-progress
- Add this tab for? Accredited Track
- Visible for? Profile Owner, Mentor, Board Member
- Content:
- Shortcode with [] wpcode id=”10965″
- This shortcode is associated with the Code Snippets plugin
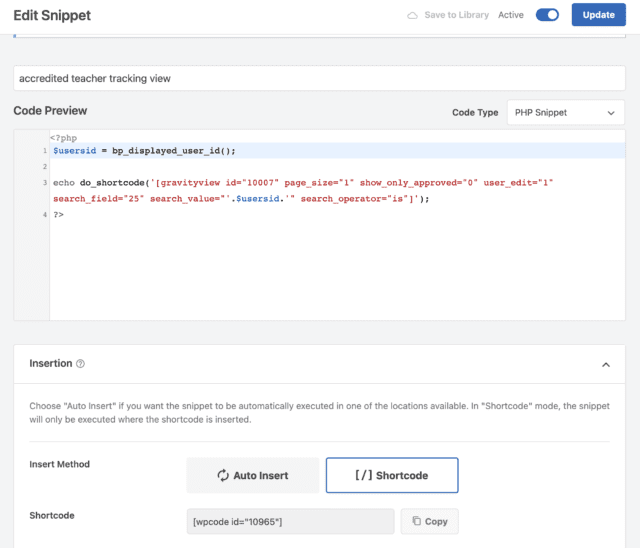
The shortcode enters a bit of PHP code.
- $usersid = bp_displayed_user_id();
- This gets the id of the user whose profile we are viewing and stores it as a variable.
- gravityview id=”10007″ page_size=”1″ show_only_approved=”0″ user_edit=”1″ search_field=”25″ search_value=”‘.$usersid.'” search_operator=”is”
- Regular Gravity View shortcode that only returns one form with the User ID of the profile we are viewing.
So far we have
- Created a form
- Created a view to display data from that form
- Created a profile tab
- Embed the view in said profile tab
We still need to actually create one form per user with the Accredited Track role.
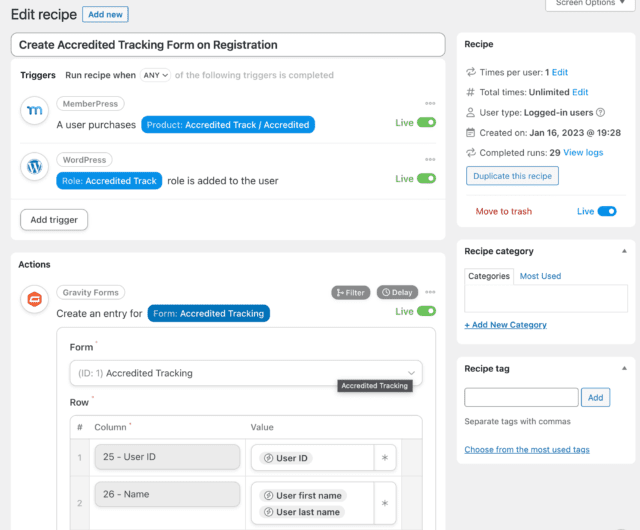
Automator > All Recipes > Edit Create Accredited Tracking Form on Registration Recipe
This recipe triggers whenever someone purchases the Accredited Track membership through MemberPress or a user is given the Accredited Track role. It only triggers once per user so multiple forms won’t be generated.
The action of Create an Entry for Accredited Tracking form then adds the user’s ID to the correct spot and their name for easier identification. The ID is the main distinction that allows them to change their username/email/name while not breaking the View.
The result is this form automatically appears on Accredited Track profiles, immediately editable by them.
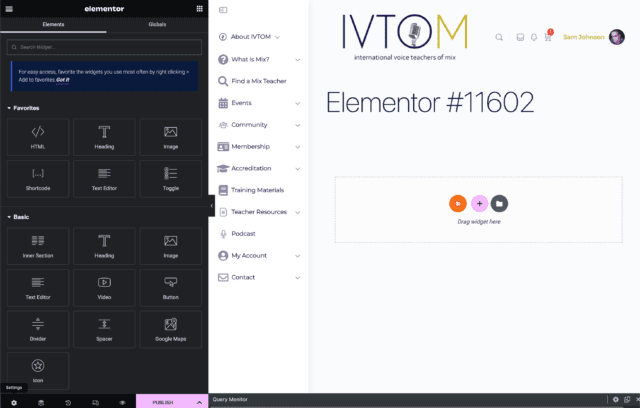
Pages > Add New
Click Edit With Elementor then wait for it to load.
- Click the Settings Gear in the bottom left to change the page title, published status, add a featured image, choose whether or not to hide the title, and the page layout. If you want there to be a sidebar with links, keep the page layout set to default.
- If you lose your place click the arrow or three lines in the upper left corner until you find the home page that looks like the above screenshot.
These are instructions for teachers to create a new studio listing:
- Go to https://www.ivtom.org and click “Sign In”
- Click “My Account” in the main menu, then “My Studio Listings”
- Click the “Submit Listing” button
- Fill out the form.
- Click “Save & Preview”
These instructions are for Dean.
When a teacher creates a new listing, Dean receives an email telling him it needs to be reviewed and published.
Dean follows the link in the email and then must:
- Publish the listing AND
- Mark it Accredited (in “Categories”, on the right sidebar) so that it shows up in search results.
If someone wants to register as a medical professional, send them this link:
If someone’s subscription has lapsed for lack of payment, here are instructions to send them to fix it:
- Log in to https://www.ivtom.com
- Click on “My Account”, then “Membership”, then “Subscriptions”
- Where the membership is listed, scroll to the right and then select “Update”
- Restart the subscription.(They don’t need to go to PayPal or Square to do it.)
There are a few reasons a membership may have turned off, but the most frequent one we are seeing in the first year of the new website’s life is a lack of communication from PayPal to Memberpress regarding renewals. Thus the person pays, but Memberpress doesn’t know they have paid.
This documentation covers only that situation. For others, ask Adrienne (adrienne.osborn@gmail.com).
The solution is to create a new transaction in Memberpress manually.
- In Memberpress, find the person’s subscription. Note the subscription ID and the person’s username.
- Click on number of transactions to see the transaction list.
- Click the “Add New” button to create a new transaction.
- Fill in the fields as follows: Payment method is PayPal; Date is date the subscription should have renewed; username and subscription are the values you noted.
- Be sure to click the “Default” button next to the Subscription Ends field to set the end date, so that the subscription will terminate at the end of its cycle.
- Return to Memberpress->Subscriptions and find the subscription again. Verify that it is now Active. If it’s not, there may be other data issues.